Subtractive Manufacturing Tolerance Standards Overview
Choosing right tolerance is essential for any engineering project because it determines its future application possibilities, lead time, and price.
This article was first published on
xometry.proChoosing right tolerance is essential for any engineering project because it determines its future application possibilities, lead time, and price.
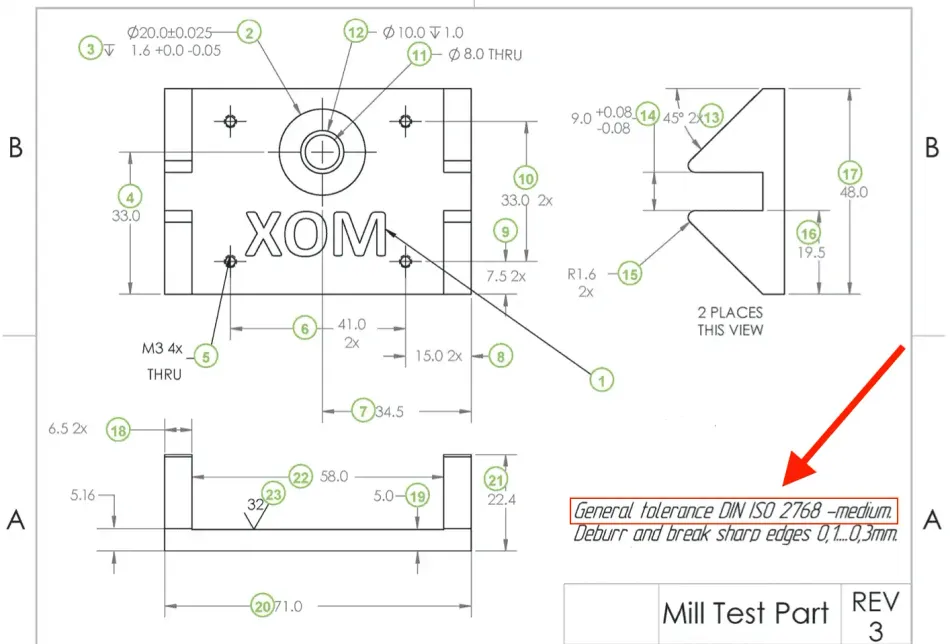
Designers and engineers add tolerances to the drawing specifications to ensure that the size and geometry of the features on component parts are controlled. However, adding tolerances to every single feature of a part can be time consuming and inefficient. That’s why the use of certain standardised tolerance values is a regular practice nowadays (read more about tolerances in CNC Machining).
In Europe and many other parts of the world, these values are defined by ISO tolerance standards. These standards stipulate tolerance values for different part geometries and are further divided into classes and grades with different levels of quality.
Tolerance standards often reduce the work of designers. Instead of calculating tolerances for every geometry and feature in a model, they can simply make use of the standard that matches their desired quality level.
Tolerance Standards Used in Europe
Tolerance standards vary depending on the manufacturing processes. For example, the most common tolerance standards that are used by engineers in Europe for subtractive manufacturing (e.g. CNC machining) are defined by ISO 2768 and ISO 286. At Xometry we offer 5 options:
- ISO 2768 – Fine
- ISO 2768 – Medium
- ISO 286 – Grade 6
- ISO 286 – Grade 7
- ISO 286 – Grade 8
The main difference between ISO 286 and 2768 is that ISO 2768 covers general tolerances ranges for linear and angular dimensions, ISO 286 covers general tolerances ranges for cylinders and opposite parallel surfaces, for example, for shaft and hole systems. These tolerance standards can be used in parallel to each other, if the design has the features that both of them cover.

The table below gives a concise summary of these tolerance standards. More elaborate explanations of the standards are provided later in the article.
Here’s a short overview of the main differences in tolerances:
| Tolerance Standard | General Linear Tolerances | General Tolerances for External Radius and Chamfer Heights | Angular Dimensions |
|---|---|---|---|
| ISO 2768 – Medium (Standard) | ±0.1-2 mm depending on the nominal length from 0.5 to over 2000 mm | ±0.2-1 mm depending on the nominal length from 0.5 to over 6 mm | ±1°-0°5’ depending on the nominal length from up to 10 to over 400 mm |
| ISO 2768 – Fine | ±0.05-0.5 mm depending on the nominal length from 0.5 to over 2000 mm | ±0.2-1 mm depending on the nominal length from 0.5 to over 6 mm | ±1°-0°5’ depending on the nominal length from up to 10 to over 400 mm |
| ISO 286 – Grade 8 | Standardized tolerance value ranges from 0.014 to 0.23 mm depending on the nominal size from 0.5 to 2000 mm | ||
| ISO 286 – Grade 7 | Standardized tolerance value ranges from 0.010 to 0.150 mm depending on the nominal size from 0.5 to 2000 mm | ||
| ISO 286 – Grade 6 | Standardized tolerance value ranges from 0.006 to 0.092 mm depending on the nominal size from 0.5 to 2000 mm | ||
ISO 2768
ISO 2768 and the derived geometrical tolerance standards are mainly employed for parts that are manufactured by machining or other material removing processes.
The ISO 2768 only applies to the following drawings with the following features. It is used when these features do not have custom tolerance indications individually:
- Linear dimensions (external sizes, internal sizes, diameters, distances, chamfer heights, radii)
- Angular dimensions
- Linear and angular dimensions produced by machining assembled parts.
Linear Dimensions
| Nominal Length (mm) | Tolerance Class Values (mm) | ||
|---|---|---|---|
| Above | Up to and including | Fine | Medium |
| 0.5 | 3 | ±0.05 | ±0.1 |
| 3 | 6 | ±0.05 | ±0.1 |
| 6 | 30 | ±0.1 | ±0.2 |
| 30 | 120 | ±0.15 | ±0.3 |
| 120 | 400 | ±0.2 | ±0.5 |
| 400 | 1000 | ±0.3 | ±0.8 |
| 1000 | 2000 | ±0.5 | ±1.2 |
| 2000 | 4000 | – | ±2.0 |
External Radius and Chamfer Heights
| Nominal Length (mm) | Tolerance Class Values (mm) | ||
|---|---|---|---|
| Above | Up to and including | Fine | Medium |
| 0.5 | 3 | ±0.2 | ±0.2 |
| 3 | 6 | ±0.5 | ±0.5 |
| 6 | Above | ±1.0 | ±1.0 |
Angular Dimensions
| Nominal Size (mm) | Tolerance Class Values (°,ˈ ) | ||
|---|---|---|---|
| Above | Up to and including | Fine | Medium |
| – | 10 | ±1° | ±1° |
| 10 | 50 | ±0°30ˈ | ±0°30ˈ |
| 50 | 120 | ±0°20ˈ | ±0°20ˈ |
| 120 | 400 | ±0°10ˈ | ±0°10ˈ |
| 400 | Above | ±0°5ˈ | ±0°5ˈ |
ISO 286
The ISO 286 applies to subtractive manufacturing methods and provides tolerances to be used for linear sizes of the following types of features:
- Cylinder
- 2 parallel opposite surfaces
This tolerance only applies drawings with these features. It is used when these features do not have custom tolerance indications individually. We offer three quality grades under the ISO 286 standard. They are grade 6 (IT6), grade 7 (IT7), and grade 8 (IT8).
The ISO 286 provides a standardized selection of tolerance classes for general purposes from amongst the numerous possibilities.
According to the ISO 286 standard, the following terms apply:
- Nominal Size: This is the size of a feature as defined by the drawing specifications
- Actual size: This is the size obtained by measurement
- Upper limit of size: The is the largest permissible size of the feature
- Lower limit of size: This is smallest permissible size of the feature
- Tolerance: Difference between the upper limit of size and the lower limit of size.
| Nominal Size (mm) | Standard Ranges of Tolerance Grade | |||
|---|---|---|---|---|
| Above | Up to and including | IT6 | IT7 | IT8 |
| – | 3 | 0.006 | 0.010 | 0.014 |
| 3 | 6 | 0.008 | 0.012 | 0.018 |
| 6 | 10 | 0.009 | 0.015 | 0.022 |
| 10 | 18 | 0.011 | 0.018 | 0.027 |
| 18 | 30 | 0.013 | 0.021 | 0.033 |
| 30 | 50 | 0.016 | 0.025 | 0.039 |
| 50 | 80 | 0.019 | 0.030 | 0.046 |
| 80 | 180 | 0.022 | 0.035 | 0.054 |
| 120 | 180 | 0.025 | 0.040 | 0.063 |
| 180 | 250 | 0.029 | 0.046 | 0.072 |
| 250 | 315 | 0.032 | 0.052 | 0.081 |
| 315 | 400 | 0.036 | 0.057 | 0.089 |
| 400 | 500 | 0.040 | 0.063 | 0.097 |
| 500 | 630 | 0.044 | 0.070 | 0.110 |
| 630 | 800 | 0.050 | 0.080 | 0.125 |
| 800 | 1000 | 0.056 | 0.090 | 0.140 |
| 1000 | 1250 | 0.066 | 0.105 | 0.165 |
| 1250 | 1600 | 0.078 | 0.125 | 0.195 |
| 1600 | 2000 | 0.092 | 0.150 | 0.230 |
| 2000 | 2500 | 0.110 | 0.175 | 0.280 |
| 2500 | 3150 | 0.135 | 0.210 | 0.330 |
Equivalent US Standards
Tolerance standards applied in Europe (ISO) have their equivalent US counterparts (ASME). There are a number of differences between the ISO and ASME tolerance standards.
The table below shows the equivalent US standards of some European tolerance standards.
| Standard | ISO 2768 (fine) | ISO 2768 (medium) | ISO 268 grade 6 | ISO 268 grade 7 | ISO 268 grade 8 |
|---|---|---|---|---|---|
| Equivalent US standard | – | – | ASME B4.1 Grade 6 | ASME B4.1 Grade 7 | ASME B4.1 Grade 8 |
Conclusion
These tolerance standards are used in place of custom tolerancing. Upload your models for CNC machining on our instant quoting platform and select one of the five listed classes and grades. If your part requires custom tolerances, you would need to also upload the necessary part drawings.
