The power of 3D scanning for corrosion and mechanical damage assessment
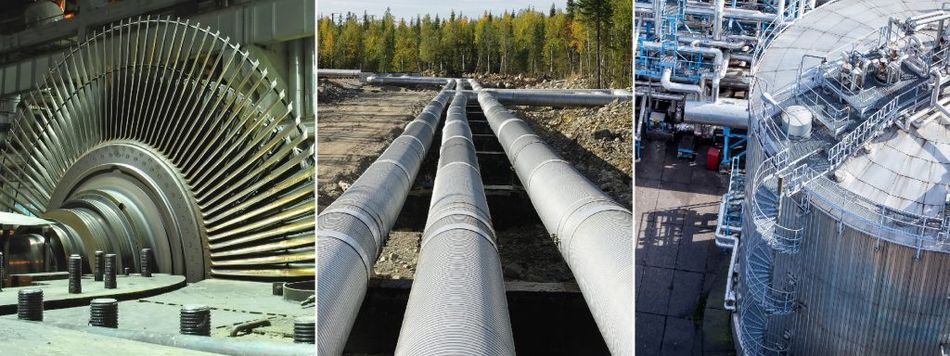
A recent study shed light on the most important factor when it comes to managing asset integrity in refineries, power plants, and pipelines in the field.

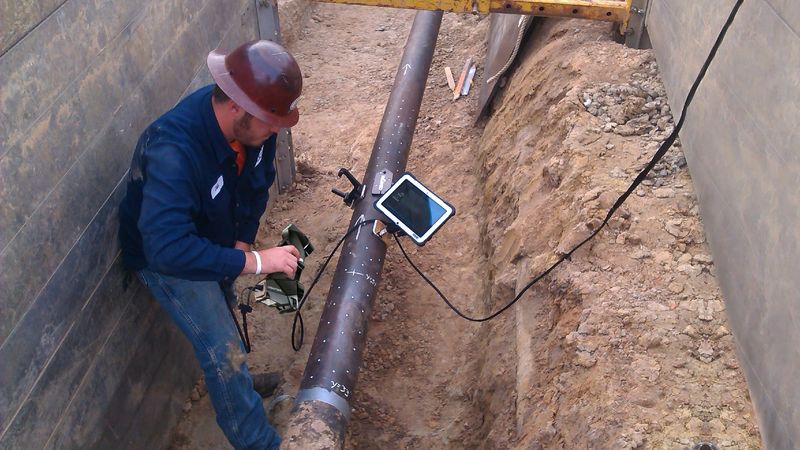
Typical working environment when measuring pipelines
A recent study1 shed light on the most important factor when it comes to managing asset integrity in refineries, power plants, and pipelines in the field. Fifty-eight percent of the people surveyed identified accuracy and repeatability as the most important factors when managing asset integrity and choosing an inspection technology.
The study was conducted in May and June 2021 on the website creaform3D.com and included site users, both customers and non-customers. Details available upon request.
Since 3D scanning is well established in the automotive and aerospace industries, it is not surprising that the vast majority of pipeline operators surveyed (97%) were willing to adopt the technology for corrosion and mechanical damage assessment. Nevertheless, they also mentioned wanting more information about the technology as well as more knowledge about its performance.
This article highlights the possibilities offered by 3D scanning, such as better information-based decision-making for repairs, major financial savings, and improved public safety. It also presents information to help NDT professionals choose the right 3D scanner for the right application. In short, it answers the following questions:
• How does 3D scanning differentiate itself from traditional NDT techniques?
• What are the different types of 3D scanners and their advantages according to specific applications?
• What do users who have opted for 3D scanning say about the performance of the technology when assessing pipeline corrosion and mechanical damages?
Challenges In Pipeline Inspection
A complete pipeline integrity assessment requires the use of different tools and technologies to characterize the material integrity and provide a trusted diagnostic. Traditional NDT techniques for corrosion and mechanical damage assessment include magnetic flux leakage, ultrasonic, and manual measurement tools, such as the pit gauge. Nonetheless, these methods are increasingly challenged by 3D scanning.
Technician and Environment Dependency
Manual techniques have the inconvenience of making the inspection highly dependent on the environment and the technician’s skills. Measurements are taken in difficult environments where conditions and positions are far from being optimal and ergonomic; technicians often lie on the ground, in the mud, under the pipe, or suspended from a rope, in the air or on scaffolding.
These difficult conditions may affect the technicians’ ability to find the deepest points and measure them accurately. Moreover, their attention may diminish as the inspection lasts, producing inaccurate measurements and variable results, which could impact the quality of the report and the decision-making.
Duration of the Inspection Process
When calculating burst pressure with manual techniques, the finer the grid, the more accurate the measurements. This means that a 2X smaller grid represents 4X more measurements (squared function). Multiple data points take time to measure, and when these data points need to be remeasured, the technician has to go back in the ditch and take the chance to redo measurement errors.
Analysis Report and Diagnosis
Manufacturers of manual tools do not offer a software platform that goes as far as calculating the burst pressure based on the complete standard. With their solution, it is possible to export the depth measurement results table. Still, integrity assessment engineers must calculate the burst pressure and make crucial decisions, such as replacing a pipe segment, by looking at an Excel table filled with numbers.
Solution To Ensure Public Safety And Increase Profitability
Asset owners seek to maximize the useful life of pipelines without compromising public safety. When a decision is made to replace a pipe segment, both maintenance costs and a service interruption are involved. Therefore, integrity managers need accurate inspections and repeatable measurements in which they trust to make the right maintenance decisions.
3D scanning brings the needed accuracy and repeatability, as well as speed, user independence, and 3D visualization. Thus, integrity engineering teams can make the right decision that ensures public safety and maximizes their chance of remaining on schedule and within budget in order to provide pipeline owners with better profitability.
Speed
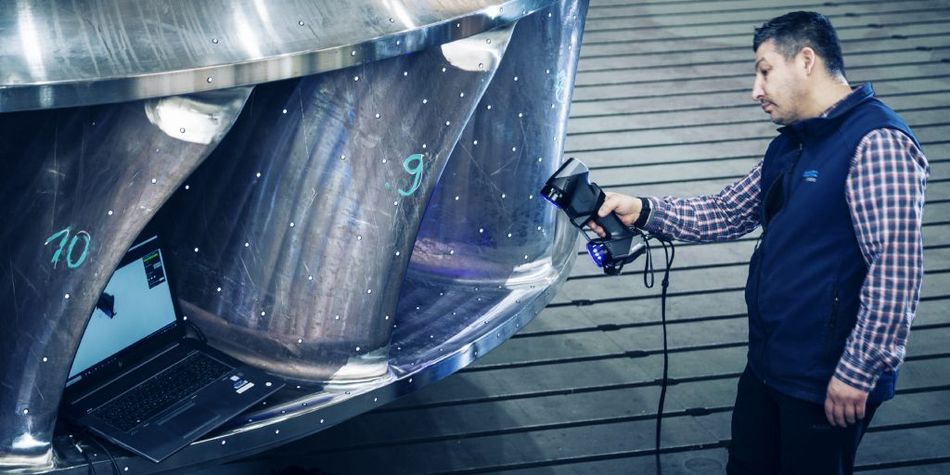
3D scanning accelerates both the acquisition and evaluation of damages, providing a faster integrity assessment. 3D scanners have the capability to capture and evaluate all damaged sections at once. Compared to manual measurement tools, the acquisition is faster and more accurate and the acquired data is processed more quickly, helping integrity managers make better-informed decisions faster.
User Independence
Scanning data is repeatable, and results are the same regardless of the technician’s skills and expertise. Measurement is not only independent of the user but also of environmental instabilities, which are present in pipeline inspections in the field, in refineries, and in power plants. Moreover, user independence helps to increase the confidence level of integrity engineering teams, accelerating and improving the decision-making process. It also helps field technicians by removing the pressure they face to find damages. Technology assists them in their work and eliminates potential human errors.
3D Visualization
Confidence in the decision-making process increases even more with 3D visualization, which provides integrity engineers with a complete 3D picture of the pipe’s critical areas—with color and texture. By zooming in or out and rotating it, they can assess damages as if they were in the field themselves. Compared to Excel tables, a full 3D view of the pipe’s internal and external surfaces contributes to more effective decision-making, which has a positive impact on public safety as well as on profitability.
3D Scanner Comparison
Two major 3D scanning technologies are available on the market: laser-based technology and white-light technology. Both scanner types offer similar performance in terms of speed, user independence, and 3D visualization. However, when comparing them, versatility stands out as an important differentiator.
Blue Laser Technology
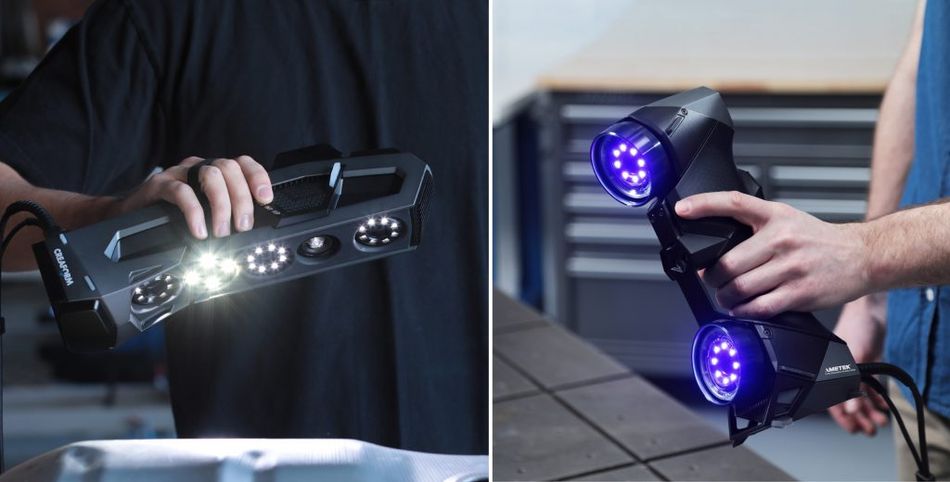
3D scanners equipped with blue laser lines, such as the Creaform HandySCAN 3D | Black Series, are the most recent innovation in the 3D scanning world. They deliver accurate and repeatable results across all work conditions, whether under direct sunlight or in harsh environments, for various damage assessments, including corrosion, dents, and wrinkles. Not only can integrity engineers fully trust their reliable data, but also they can rely on its speed to take measurements, deliver results, and complete inspections quickly and efficiently. In short, with their higher versatility, blue-laser 3D scanners are a go-to solution to accurately detect all types of mechanical damages on pipelines, vessels, tanks, valves, reducers, etc.

Structured Light Technology
3D scanners equipped with white-light technology, such as the Creaform Go!SCAN 3D, offer a complete 3D picture (with geometry, texture, and color) to NDT technicians who perform damage assessments. Thanks to its impressive speed, setup time and field deployment are quicker, shortening the time spent in the ditch. Because the technology is sensitive to sunlight, it requires shade to work outside properly; however, it is perfectly suitable for working inside tanks, vessels, and power plants.
Integrity Assessment Software
In addition to benefiting from 3D scanners’ performance, integrity engineers must be able to rely on an innovative NDT software, such as Creaform Pipecheck, for their on-site inspection, detection, and characterization of pipe defects. The combination of both hardware and software produce more accurate and repeatable results, which are traceable for future pipeline integrity analysis.
Ndt Companies’ Trust In 3D Scanning
Many NDT companies are aware of the benefits of using 3D scanning for corrosion and mechanical damage assessment:
TEAM: Benefits of 3D Scanning regards Safety and Data Quality
“At TEAM, it is our goal to provide our customers with the safest and highest quality solution to any of the leak sealing needs that they might have. Innovation is one of our core values, and we stand by this by looking into new technologies that we can consistently bring to the field to provide our safest solution.”
NATIONAL GRID: Demonstration of Speed and User Independence
“Each technician should get the exact same results, which means we can be 100% certain that we’re choosing the deepest points. We also get more data available on the damage of pipelines, which helps to make decisions on whether the pipeline needs repair, or it can return to service.”
Key Takeaways
By opting for 3D scanning, integrity managers can expect to increase the speed of data acquisition and analysis while getting a complete 3D visualization of user-independent results. Thus, faster access to better data increases the confidence level in the results, leading to better information-based decision-making, major financial savings, and, above all, improved public safety.

When choosing a 3D scanner for damage assessment, which includes corrosion, dents, and wrinkles, integrity engineers should consider how versatile it needs to be and will it be used 1) under direct sunlight or 2) inside tanks, vessels, and power plants. A blue-laser 3D scanner is the ultimate choice for both applications, while a structured-light 3D scanner brings important benefits in the second application. Bundled with innovative integrity assessment software, this trusted solution enables asset owners to stick to planned budgets and timelines while ensuring pipeline integrity and public safety.
