The Most Detailed Manufacturing Revealed-How RPWORLD Help Turn EPB Design into Reality
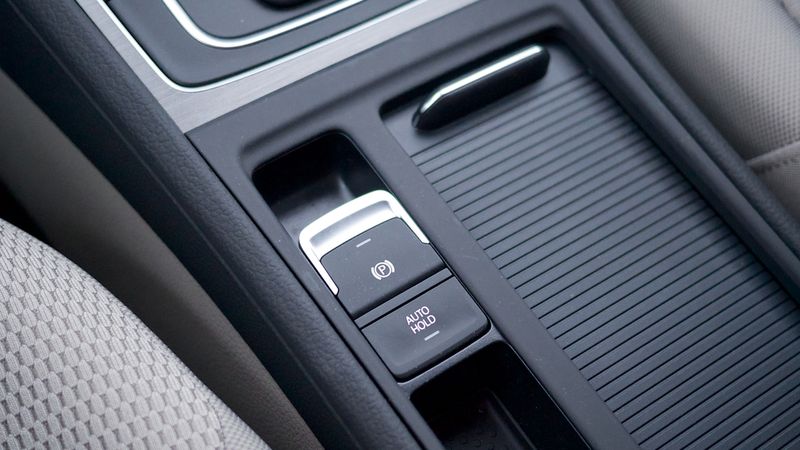
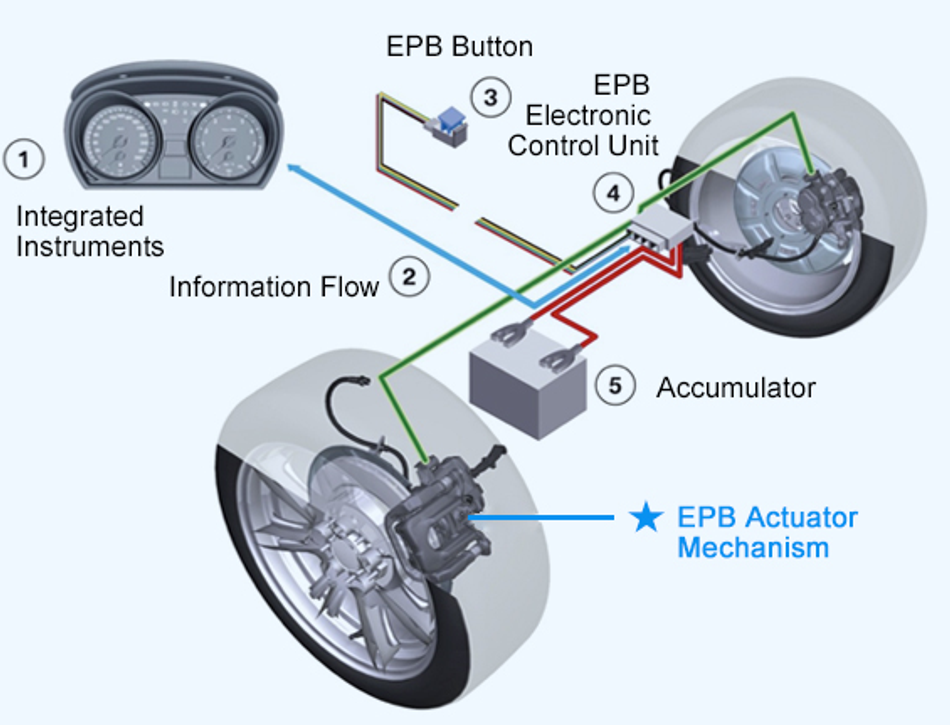
EPB, short for Electric Parking Brake, is an electric parking system, which replaces the traditional handbrake lever and cables, but safer, as the braking effect will not be affected by the force of drivers.
EPB, short for Electric Parking Brake, is an electric parking system, which replaces the traditional handbrake lever and cables, but safer, as the braking effect will not be affected by the force of drivers. In addition, its smaller package allows manufacturers to requisition more vehicle space for new options. The braking force of EPB can be adjusted to match the setting requirements of longitudinal tilt angles. The electronic handbrakes disengage automatically when pressing the button if the car starts or accelerates.
Project Background
The customer is a famous international automotive parts supplier, and RPWORLD has been providing manufacturing services of prototypes and low-volume trial run for their automotive components for years. The customer explained their pain points when our account manager visited them in person: 100 pieces of EPB actuator mechanism housings will be needed within short lead time, and injection molding and sheet metal processes of mass production should be used. However, the previous supplier couldn’t meet their requirements both on quantity and lead time.
As we have experience in manufacturing the similar housings. After analysising, we were confident of addressing client's problems. Therefore, the customer entrusted us the EPB project and provided a sample, starting the cooperation of future series projects.
RPWORLD Solutions
The customer needed a few prototypes of EPB housings within 35 days, and required full-dimensional inspection, overmolding sheet metal Pin. If applying mass production, the molds’ lead time of other supplier is around 70 days. RPWORLD came up with Rapid-Tooling solution and manufacturing arrangement to deliver the high-quality parts within the required time, ensuring the smooth testing for customer’s prototypes.
1. The Complete Technical Proposal
Early DFM analysis
We provided the specific DFM analysis, and informed customer about potential manufacturing risks and proposals after we carefully checked their 3D and 2D drawings, compared the samples’ quality provided by customer and analyzed their functional requirements. In addition, we offered simple mold drawings to facilitate customer better understand gate, parting and top-out mode.

Simulated analysis
The top shell was made of glass fiber reinforced material. The products with this material are more prone to deformation than non-filled materials due to the inconsistency of the shrinkage rate in the vertical and flow direction and the change of fiber orientation.
During the T0 sample stage, it could be seen, that the deformation both happened at interface position and the welding datum plane of housing, the deformation value at datum plane as large as 1.9mm, which wouldn’t meet functional requirements. Normally there are several solutions to relieve the plastic part’s defects, weakened from A to F based on the workload and improvement effect:
A. Modify the design to reinforce the structure;
B. Optimize the mold gate to improve the fill pressure and fiber orientation at deformation position;
C. Make pre-deformation to increase or decrease the material at the deformed position;
D. Adjust the cooling lines to improve the cooling effect;
E. Adjust the machine to try other combinations of injection parameters;
F. Correct the deformation of jig after injection molding.
With overall evaluation and the simulated analysis, we decided to try Plan B—Adding a gate to interface position and sent customer the proposal, which turned out was satisfying and relieved for them. After several days work, we improved the warpage from the initial 1.9mm to 0.5mm, saving more time and cost in production tooling.

2. Rich Experience in Mold Manufacturing
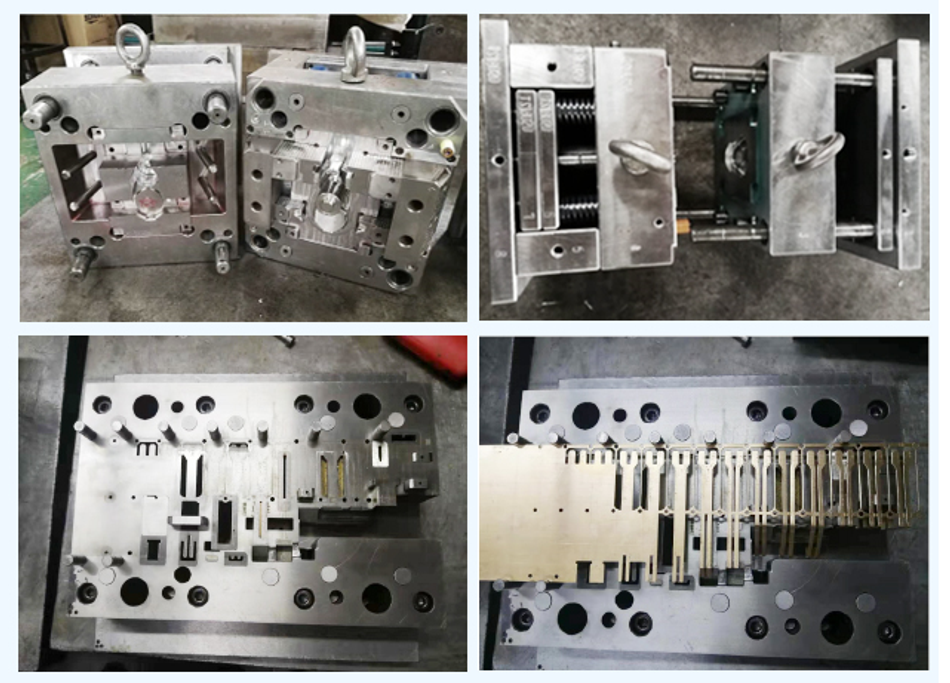
Based on the drawings requirements and products application, we treated the mold as precision tooling manufacturing, and has taken every consideration into account: the hardened and anti-corrosion materials, shrinkage rate testing, mold, conversion of dimensional tolerance of inserts and 2D design, manufacturing equipment, dimensional inspection, reserving the manufacturing space for polishing, etc. The molds consist of two kinds: injection mold and sheet metal mold. The followings are the introduction of these two kinds of molds.
Injection molds
The material is S136, which has been thermal treated and hardened. The production followed stringently to the manufacturing schedule, and we fit metal parts into the mold to test the sealing before part's production.
Sheet metal molds
Laser cutting, then bending and stamping are common processes for the sheet metal prototypes and low-volume production. But normally, the products with such multiple processes will offer lower precision. Considering about customer’s precision demand and based on our knowledge of previous similar projects, we decided to make formal sheet metal molds to realize one-place and consecutive production.
3. The Strict Control and Inspection for Incoming Materials
The control and inspection for incoming materials have always been the key points for the quality control at RPWORLD. Everything will be in vain if raw materials are unqualified. To avoid that, we started inspection from two aspects:
a. Injection molding and metal incoming materials controlling
When it comes to the injection molded materials, all material suppliers are required to provide COA, and only when the Lot number in COA and the product numbers are consistent will the technicians proceed the acceptance and storage of raw materials. As for the metal materials, we uniformly demand the supplier to provide COA according to the customer’s requirement on metal grade. Meanwhile, we tested the materials with X-ray fluorescence (XRF) analyzer, and provided inspection reports.
Material datasheet and certificate
b. Tailored inspection method
The customer raised that the metal parts had to meet a mechanical property parameter—tensile strength, which just beyond our regular inspection. To ensure the manufacturing precision and meet customer’s demand, we had a third-party testing laboratory do the test and provide the following reports. The customer was satisfied with the results.
4. Standardized Parameter Control and Tailored Transparency Solutions
The top and bottom shells were required to be welded together by laser welding, which needs high laser transparency for top shell. However, the instability of laser transparency of the material assigned by customer is a common problem in the industry. While ensuring the laser transparency, we had to cut down glass emergence on the surface and maintain the tight tolerances. But those requirements narrowed down the molding window of the product. To address the issue, we got two solutions as the following:
a. Strict control for injection molding parameters
Referring to the parameters recommended in material datasheet, we made small-scale adjustments to meet above quality demand. In addition, injection molding parameters of each product are recorded to be referred in future repeated production.
b. Customized laser transparency testing instrument
We learned that this injection molding material is also transparent to ordinary light source, and the laser transparency can be detected indirectly through the transparency of ordinary light source. We tailored a special gauge and standardized the quality inspection procedures. Finally, the top and bottom shells inspected under the tailored inspection method and testing instrument all meet the customer’s requirements.
5. Full-dimensional Inspection and Tailored Inspection Instrument
Dimensional inspection has always been the top priority of quality inspection. The customer sets high requirements on product precision, including that accurate dimensions in 2D drawings, tight tolerance, specified requirements on inspection spot, etc. Meanwhile, the customer expected us to test with instrument under pre-tightened state, as they will eventually test under such conditions.
Later, the inspection instruments and scheme of each dimension were confirmed, including using the precision instruments such as 2D Automatic image measuring instrument, CMM, pin gauge, etc. And we produced the jig based on drawings provided by customer, and completed the product inspection with instrument under pre-tightened state. This facilitated us to design the jig according to customer needs in the following similar projects.
6. Packaging Solutions
The order quantity was around 100 pieces each batch. The top shell and bottom shell were welded together, so there was risk that the bonding wire might be damaged during transportation. At RPWORLD, we have a standard packaging solution to protect products during transportation. For this specific welding position, we firstly made sure the position was clean and complete, then assembled the parts and wrapped them with textured tape. This is to protect the welding wire from broken during transportation.
Project Benefits
What benefit the customer greatly is that our Rapid-Tooling solutions and manufacturing processes cut down their 50% development time and save more manufacturing cost, ensuring the smooth progress for their EPB development, and accelerating the products to market.
Abiding by the guideline of “Under Promise, Over Deliver”, RPWORLD is committed to providing one-stop manufacturing services, and soon was entrusted more EPB projects and established long-term cooperation with customer. Meanwhile, the brand RPWORLD® was highly recognized and the brand awareness was further expanded around the globe.


