Creaform Go!SCAN 3D
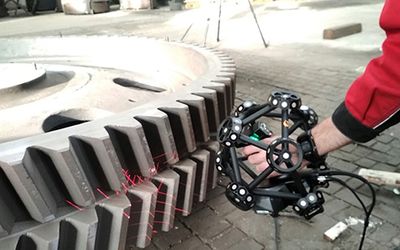
A handheld 3D scanner by Creaform featuring simplicity, fast scanning rate, and high-resolution level of colored complex surfaces.
Technical Specifications
| Accuracy | Up to 0.050 mm (0.0020 in) |
| Volumetric accuracy | 0.050 mm + 0.150 mm/m (0.0020 in + 0.0018 in/ft) |
| Measurement resolution | 0.100 mm (0.0039 in) |
| Mesh resolution | 0.200 mm (0.0078 in) |
| Measurement rate | 1,500,000 measurements/s |
| Light source | White light (99 stripes) |
| Positioning methods | Geometry and/or color and/or targets |
| Scanning area | 390 x 390 mm (15.4 x 15.4 in) |
| Stand-off distance | 400 mm (15.7 in) |
| Depth of field | 450 mm (17.7 in) |
| Part size range (recommended) | 0.1–4 m (0.3–13 ft) |
| Texture resolution | 50 to 200 DPI |
| Texture colors | 24 bits |
| Software | VXelements |
| Output formats | .dae, .fbx, .ma, .obj, .ply, .stl, .txt, .wrl, .x3d, .x3dz, .zpr, .3mf |
| Weight | 1.25 kg (2.7 lb) |
| Dimensions | 89 x 114 x 346 mm (3.5 x 4.5 x 13.6 in) |
| Connection standard | 1 X USB 3.0 |
| Operating temperature range | 5-40 °C (41-104 °F) |
| Operating humidity range (non-condensing) | 10-90% |
Overview
3D scanning is finding applications in quality control, prototyping, and reverse engineering, among others. Yet scanners’ inability to capture shiny or transparent-finished objects, as their surface distorts light and the data acquisition process, hampers the use of 3D scanning technology. The same is true for objects with deep-pocketed geometries where light cannot fully pass through. Scanning speed and portability are also some areas limiting the use of scanners in various industries.
Balancing portability and ease of use, the user-friendly Go!SCAN 3D can scan objects setup-free. This handheld 3D scanner can measure any complex surface having high detail level, allowing right capture the first time. Not only does it impressively acquire texture and geometry, but it can also capture details over a rich color palette. Integrating Go!SCAN 3D in modeling software paves the way for improved product development, innovation, and shorter time to market.
Design
Simplicity & Versatility
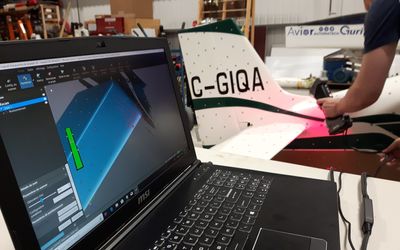
The unrivaled user-friendliness of Go!SCAN 3C makes scanning both small and large objects possible. The simple user interface of the scanner performs real-time mesh visualization without part preparation. The point-and-shoot design delivers an instant scan preview in real-time.
The 390 x 390 mm (15.4 x 15.4 in) scanning area can identify positioning via geometry, color, or targets. The scanner has a 450 mm depth of field and a 400 mm stand-off distance. The recommended part size range is from 0.1m to 4m or 0.3-13ft.
Portability
The Go!SCAN 3D design prompts a scanning process that undeniably transforms work to be more efficient. This portable device only measures 89 x 114 x 346 mm (3.5 x 4.5 x 13.6 in) and weighs 1.25kg (2.7lbs) that it can easily fit into a suitcase. With dynamic referencing, the scanner and object can move free while scanning.
Speed
Go!SCAN 3D’s scanning power can capture objects within minutes, hastening the integration of the image into CAD or other 3D printing software. It produces instant mesh and ready-to-use files. The 99 white light scanning lines amount to a high measurement rate of up to 1,500,000 measurements. The scanner is easy to set up and initiates function in less than 2 minutes.
Level of Details & Scan Quality
Go!SCAN 3D displays striking scan quality with its high-resolution level of detailing and full support of color. The texture resolution runs from 50 to 200 DPI at 0.100mm resolution and 24-bit texture colors. It offers high resolution for objects with intricate details at a mess resolution of 0.200mm.
Software
The scanner comes with VXelements, powering the entire 3D scanning suite and measurement technologies. It simplifies essential tools from data acquisition to CAD software in a sleek working environment for a user-friendly experience.
