3D Printer Sanding: Mastering the Art of Smooth Finishes
For FDM and other processes, 3D printer sanding is a key post-processing technique for removing layer lines and improving surface finish. Here we discuss how to do it.

09 Jul, 2024. 9 minutes read

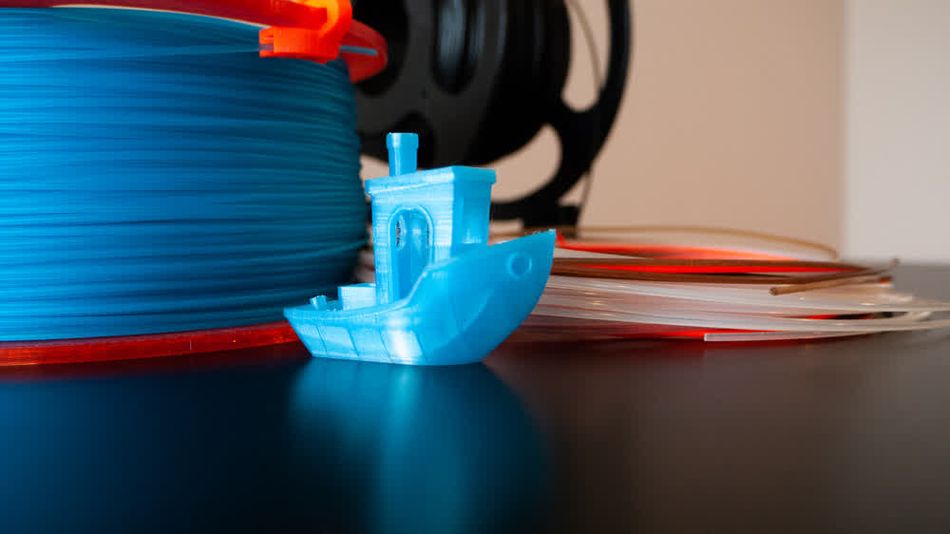
3D printing allows for the fast fabrication of objects with complex geometries. However, the layer-by-layer nature of additive manufacturing often results in visible striations and surface imperfections that can detract from the final product's quality and functionality.
This is where 3D printer sanding, a simple but important post-processing technique, comes into play. Manual or power sanding is an excellent way to remove layer lines, support structure blemishes, and various printing artifacts, resulting in a smooth and polished surface that more closely resembles a molded or cast part. Sanding ultimately allows creators to transform rough prototypes into professional-grade products.
This article delves into the art and science of 3D printer sanding, discussing suitable grits, application methods, and treatments that can be applied after sanding.
Why Sand 3D Prints?
3D printing often results in layer lines and surface imperfections due to the additive manufacturing process. Sanding smooths these layers, creating a more uniform and professional finish, which is helpful for parts intended for visual presentation or consumer products.
Additionally, sanding helps to remove minor defects and sharp edges that could compromise the part’s structural integrity or cause a safety risk to the end-user. Sanding away defects and excess roughness is also important for interlocking parts in an assembly, as friction is reduced and potential obstructions can be removed.
Furthermore, sanding prepares the surface for further treatments, such as painting, coating, or gluing. A smooth surface ensures better adhesion of paints and coatings, resulting in a more durable and aesthetically pleasing finish. For parts that need to be bonded, a smooth surface enhances the strength of the adhesive bond.
Recommended reading: PLA Smoothing: How to Smooth 3D Prints
Layer Lines and Roughness
Layer lines are an inherent characteristic of fused deposition modeling (FDM) 3D printing, resulting from the additive manufacturing process where molten thermoplastic is deposited in successive layers. As the print head extrudes material, it creates a series of parallel ridges and valleys on the object's surface, known as the "staircase effect."
The layer height, typically measured in microns (μm) or millimeters (mm), is a crucial parameter that directly affects surface roughness. Smaller layer heights produce finer details and smoother surfaces but increase print time, while larger layer heights result in faster prints at the cost of more visible layer lines. The relationship between layer height and surface roughness is generally inverse: as layer height decreases, surface smoothness increases.
Layer Height (μm) | Surface Finish | Print Time | Visible Layer Lines |
50 | Very Smooth | Very Long | Barely Visible |
100 | Smooth | Long | Slightly Visible |
200 | Moderate | Moderate | Noticeable |
300 | Rough | Short | Prominent |
Surface topology in 3D printing is quantified using parameters such as Ra (arithmetic average roughness) and Rz (mean roughness depth). Ra represents the average deviation from the mean line of the surface profile, while Rz measures the average maximum peak-to-valley height. These values are typically measured in micrometers (μm) and provide a quantitative assessment of surface roughness.
A 2021 study measured surface roughness on PLA prints printed with differing layer heights. It found that a very small layer height (50 μm) resulted in a low roughness of 9.04 μm, while a moderate layer height (200 μm) resulted in a higher roughness of 10.48 μm.[1]
Material Suitability for Sanding
The effectiveness of sanding 3D printed objects is influenced by the properties of the printing materials. Common 3D printing filaments such as PLA (Polylactic Acid), ABS (Acrylonitrile Butadiene Styrene), PETG (Polyethylene Terephthalate Glycol), and Nylon each respond differently to sanding due to their unique molecular structures and physical properties, as shown in the table below.
Material | Melting Point (°C) | Glass Transition Temp (°C) | Hardness (Rockwell R) | Sanding Characteristics |
PLA | 150–160 | 60 | 70–90 | Easy to sand, prone to heat deformation |
ABS | 220–240 | 105 | 105–110 | Moderate difficulty, heat resistant |
PETG | 230–250 | 80 | 100–105 | Moderate ease, good balance |
Nylon | 260–270 | 70-80 | 75–85 | Not particularly sandable, requires special techniques |
When choosing a sanding approach, consider the material's properties:
For PLA, use gentler sanding techniques with frequent breaks and wet sanding to prevent heat buildup.[2] Start with higher grit sandpapers (320+) to avoid aggressive material removal.
ABS can withstand more aggressive sanding. Begin with lower grits (180-220) for faster material removal, then progress to higher grits for a smooth finish.
PETG requires a balanced approach. Start with medium grits (220-320) and gradually increase, being mindful of heat generation.
For Nylon, use specialized abrasives designed for flexible materials. Employ a light touch and high-grit sandpapers to avoid deforming the surface.
Recommended reading: ABS Smoothing: Acetone Vapor Baths & Other Ways to Remove Layer Lines
Tools for 3D Printer Sanding
Basic Manual Sanding Tools
Sandpaper of various grits (see below)
Sanding block or sponge
Filler (such as Bondo or a similar plastic filler)
Putty knife or applicator
Water (for wet sanding)
Safety gear (gloves, mask, and goggles)
The grit system is crucial in achieving desired finishes, with lower numbers indicating coarser abrasives and higher numbers denoting finer grains. The FEPA (Federation of European Producers of Abrasives) P-grade system is commonly used, ranging from P12 (very coarse) to P2500 (ultra-fine).
Grit Range | Classification | Application in 3D Print Finishing |
P40–P80 | Coarse | Rapid material removal, initial shaping |
P100–P220 | Medium | Smoothing layer lines, preparing for finer grits |
P240–P400 | Fine | Removing minor imperfections, preparing for polishing |
P600–P1200 | Very Fine | Achieving smooth surfaces, pre-polishing |
P1500–P2500 | Ultra Fine | Final smoothing before polishing compounds |
For 3D print sanding, abrasives with good free cutting ability, such as open-coat sandpapers or non-loading stearated varieties, are preferable. These maintain their effectiveness longer, reducing the risk of heat buildup and ensuring consistent material removal across the print's surface.
Power Tools
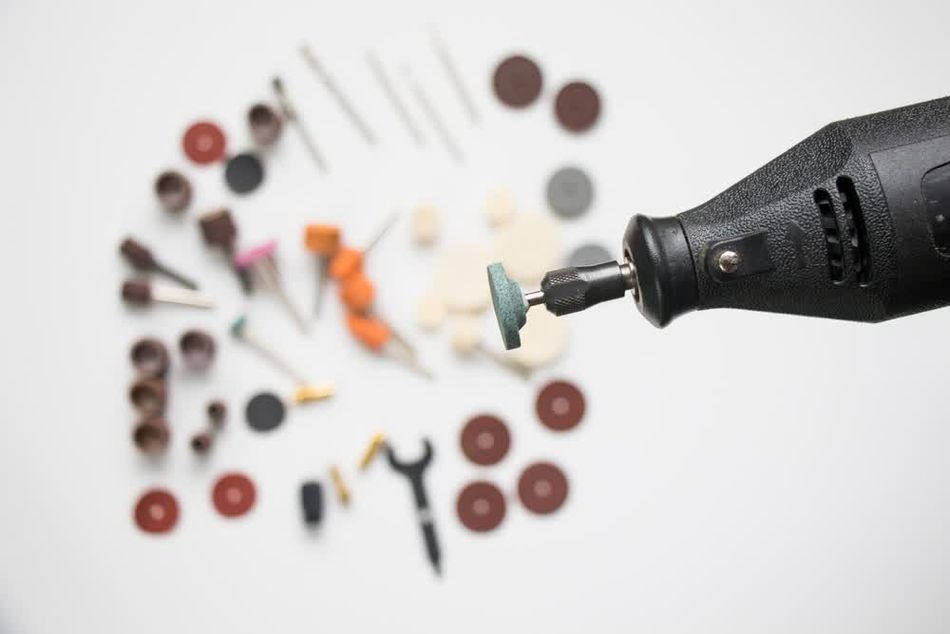
Rotary power tools such as those made by Dremel, operating at speeds of 5,000–35,000 RPM, allow for precise material removal and polishing, even in the most intricate areas of a print. Other options include orbital sanders (for larger, flatter surfaces) and belt sanders. Caution should be exercised with power tools, as they can generate heat that deforms the plastic part.
How to Sand 3D Prints
Remove Supports and Excess Material: Begin by carefully removing any support structures and excess material using pliers or a craft knife. Ensure that you do this gently to avoid damaging the part.
Start with Low Grit Sandpaper (60–80 grit): Attach the sandpaper to a sanding block or use a sanding sponge for better control. Sand the entire surface of the print using circular or back-and-forth motions. This step removes the most noticeable layer lines and large imperfections.
Apply Filler: After coarse sanding, clean the part to remove any dust. Apply filler to the surface of the print using a putty knife or applicator. Spread the filler evenly, ensuring it fills all the gaps, holes, and layer lines. Allow the filler to dry completely as per the manufacturer's instructions. Drying times can vary depending on the type of filler used.
Sand the Filler with Low Grit Sandpaper (60–80 grit):Once the filler is dry, sand the entire surface again using coarse grit sandpaper. This step smooths out the filler and blends it with the surrounding plastic. Use circular or back-and-forth motions to ensure an even surface. If needed, apply a second coat of filler to areas that still require smoothing and repeat the drying and sanding process.
Move to Medium Grit Sandpaper (100–220 grit): Continue sanding the part with medium grit sandpaper. This step further smooths the surface and begins to refine the texture. Use similar circular or back-and-forth motions.
Wet Sanding (Optional): For a smoother finish and to reduce dust, you can wet sand. Dip the sandpaper in water or lubricant and sand the part. This helps achieve a finer finish and keeps the sandpaper from clogging.
Use Fine Grit Sandpaper (240–400 grit): Once the surface is fairly smooth, switch to fine grit sandpaper. This step polishes the surface and prepares it for any additional finishing processes. Continue to use wet sanding if you started with it.
Inspect and Touch Up: Inspect the entire part for any remaining imperfections. Use even finer grit sandpaper (up to 2500 grit if necessary) to touch up any specific areas that need more work.
Clean the Part: Once satisfied with the sanding, clean the part thoroughly. Rinse it with water if you used wet sanding, and allow it to dry completely. If necessary, use compressed air to remove any remaining dust particles. The part is then ready for priming, painting, or coating.
Tackling Intricate Details and Hard-to-Reach Areas
Overhangs, internal cavities, and fine details can complicate the sanding process. For intricate details, micro-abrasive tools come to the forefront. Needle files, with their fine-toothed precision, excel at refining small features without compromising overall geometry. Abrasive-impregnated rubber points, available in various shapes and grits, conform to complex contours while providing controlled material removal. These tools, when used with a steady hand and magnification, can achieve remarkable levels of detail refinement.
Hard-to-reach areas demand creative solutions. Abrasive cords and tapes can be threaded through narrow openings, allowing for sanding in confined spaces. Flexible shaft rotary tools with miniature attachments extend the reach into deep recesses. For internal cavities, flap wheels mounted on extended mandrels can provide an effective means of smoothing otherwise inaccessible surfaces.
Post-Sanding Treatments
Post-sanding treatments can enhance the durability and functionality of 3D printed parts. Perhaps the most common technique carried out after sanding is polishing with a compound to achieve a mirror-like shine instead of a matte finish.
Common sealants and coatings for sanded 3D printed parts include epoxy resins, polyurethane, acrylic clear coats, and specialized 3D printing sealants. These treatments not only improve aesthetics but also alter the mechanical properties of printed parts. Epoxy resins, for instance, increase hardness and chemical resistance, making them ideal for functional prototypes.[3] Polyurethane coatings offer excellent flexibility and abrasion resistance, suitable for parts subject to wear. Acrylic clear coats provide UV protection, preserving color and preventing degradation in outdoor applications.
3D printer users may also follow up their 3D printer sanding with priming and painting for aesthetic purposes. Priming fills minor imperfections and provides a uniform base for subsequent treatments. High-build primers, applied in thin layers and sanded between coats, are particularly effective for smoothing residual layer lines.
Conclusion
Mastering the art of sanding 3D printed parts is crucial for achieving high-quality smooth 3D prints even with processes like FDM. While alternative processes like acetone smoothing are excellent for finishing 3D prints made from ABS, sanding is a versatile option suitable for PLA 3D prints and most other materials — and even works on parts made using other 3D printing technologies.
Frequently Asked Questions
What grit sandpaper should I start with for 3D printed parts?
Generally, start with a coarse grit (P60–80) for removing layer lines, progressing to finer grits for smoother finishes. Larger layer heights or harder materials may require starting with a coarser grit.
How can I avoid over-sanding and losing detail on my 3D prints?
Use light pressure and check progress frequently. Employ masking techniques to protect detailed areas. For intricate parts, consider using finer grits and sanding sponges that conform to complex geometries. Utilize magnification to monitor detail preservation during sanding.
What's the best way to sand ABS and PLA prints?
For ABS, use progressively finer grits and consider wet sanding to prevent heat buildup. Alternatively, ABS responds well to vapor smoothing with acetone. PLA is more heat-sensitive; use lighter pressure, finer grits, and avoid generating excessive heat. Water-based wet sanding works well for PLA.
How do I achieve a glossy finish on my 3D printed parts?
After progressive sanding up to a fine grit, use a polishing compound followed by a fine polish. For a final touch, apply a clear coat designed for high gloss finishes.
Can automated finishing methods like tumbling damage delicate 3D printed parts?
Yes, delicate parts can be damaged in tumbling processes. For fragile prints, use gentler methods like vibratory finishing with soft media or short cycle times. Alternatively, consider protective coatings or custom fixtures to shield delicate features during automated finishing.
References
[1] Bintara RD, Lubis DZ, Pradana YR. The effect of layer height on the surface roughness in 3D Printed Polylactic Acid (PLA) using FDM 3D printing. InIOP conference series: materials science and engineering 2021 Feb 1 (Vol. 1034, No. 1, p. 012096). IOP Publishing.
[2] Mwema FM, Akinlabi ET, Mwema FM, Akinlabi ET. Surface Engineering Strategy. Fused Deposition Modeling: Strategies for Quality Enhancement. 2020:51-68.
[3] Goodman SH. Epoxy resins. Handbook of thermoset plastics. 1999 Dec 31:193-268.