3D Scanning for Inspection: Are 3D Scanners A Smart Choice?
In this post, we want to offer you guidance on why choosing 3D scanning for inspection. We want to help you differentiate the different types of 3D scanners and metrology software, and choose the best one for your inspection needs.

Quality control is defined as the process to ensure that a manufactured part corresponds to a defined set of quality criteria or customer requirements. It usually involves measuring, checking, testing, or inspecting various characteristics on a part and comparing them with the standards and specifications, such as CAD models, to determine whether there is conformity or not.
Quality inspection during the manufacturing process is important because it guarantees standardization and uniformity of the product quality and helps companies maintain their high standards of manufacturing. Consumers are those who benefit the most from quality control because they get products of better quality. As quality rises, satisfaction intensifies and retention increases, which contributes to reinforcing existing demands and developing new ones.
Manufacturing companies have several choices of measurement devices for quality control. They can favor coordinate measuring machines (CMMs), which are certainly the most accurate metrology equipment available for quality inspection. However, getting this high level of accuracy comes with certain inconveniences. As they are not the fastest metrology tool—in terms of programming and operating times—CMMs are often extremely loaded by all types of inspection. This is how 3D scanning comes into play as one of the best processes for quality control and one of the best alternatives to unload the CMM.
In this post, we want to offer you guidance on why choosing 3D scanning for inspection. We want to help you differentiate the different types of 3D scanners and metrology software, and choose the best one for your inspection needs. Finally, we want to explore how opting for 3D scanning can benefit your company and your customers.
What is 3D Scanning?
3D scanning is the process of analyzing a physical object or environment by collecting data on its shape, geometry, and texture. The collected data can then be used to construct digital 3D models.
A 3D model consists of a point cloud of geometric samples collected on the surface of an object. These points are then used to extrapolate the shape, geometry, and texture of the physical object; a process that is also called reconstruction. 3D scanners are the measuring instruments used to collect the 3D data needed to build 3D models.
What are the Different Types of Metrology 3D Scanners?
There are two main types of 3D scanners for digitally acquiring the shape, geometry, and texture of physical objects: contact and non-contact.
Contact 3D scanners probe objects through physical touch, while the object is resting on a precision flat surface or supported by a fixture. Traditional CMMs, articulated measuring arms, and hand-driven touch probes are examples of contact 3D scanners.
Non-contact 3D scanners usually shine laser lines or white light on the object and detect its reflection with cameras in order to get information about its shape, geometry, and texture. This technique is called triangulation because the laser reflection, the camera, and the laser emitter form a triangle.
Laser-based 3D scanners, structured-light (or white-light) 3D scanners, and optical CMM 3D scanners are examples of non-contact 3D scanners. Photogrammetry is also a non-contact method used to get information about the shape of physical objects based on the analysis of photographic images.
What Metrology-Grade 3D Scanners should you Choose for Quality Control?
Quality control requires highly accurate measuring instruments. Therefore, it is logical to assign inspections of high-tolerance features to traditional CMMs, whereas 3D scanners become the alternative for all other quality control applications, specifically those that occur on the shop floor. Not only are they less expensive to purchase, but they also measure faster, require less training, handling, and programming time, and save precious CMM time for critical inspections.
More importantly, 3D scanners contribute to reducing the workload of traditional CMMs and solving bottleneck issues.
Creaform’s comprehensive range of portable 3D optical measurement technologies is specifically designed to support dimensional inspection for quality control in a production environment. Thanks to their impressive accuracy, speed, portability, and versatility, they enable quality control and quality assurance professionals to validate the conformity and quality of manufactured parts regardless of size, shape, material, surface finish, and complexity.
3D Scanners Specially Designed for Inspection
MetraSCAN 3D
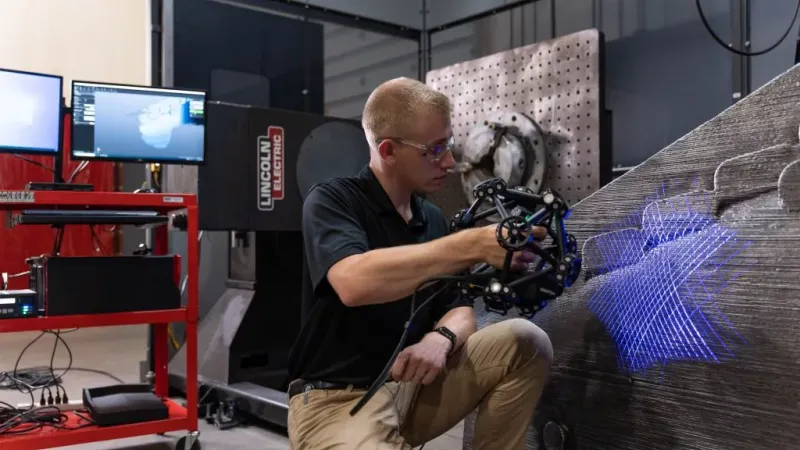
The MetraSCAN 3D is Creaform’s most complete 3D scanning solution for metrology-grade measurements and 3D geometrical surface inspections. Insensitive to shop floor vibrations, part movement, and environmental instability, it significantly increases the efficiency of quality control processes.
Certified ISO 17025, it is also perfect for measuring complex shapes and reflective materials both in the metrology lab and on the production floor.
With its 15 blue laser crosses, which can capture up to 1,800,000 data points per second, it can capture both fine details and large volumes. From a quick setup to real-time scans and ready-to-use files, its unrivaled measurement speed ensures optimized acquisition time and maximized data processing rate, even on large structures.
In short, the MetraSCAN 3D is the ideal solution for manufacturing and metrology professionals who want to deliver approved quality parts quickly and efficiently.
HandySCAN 3D | BLACK Series
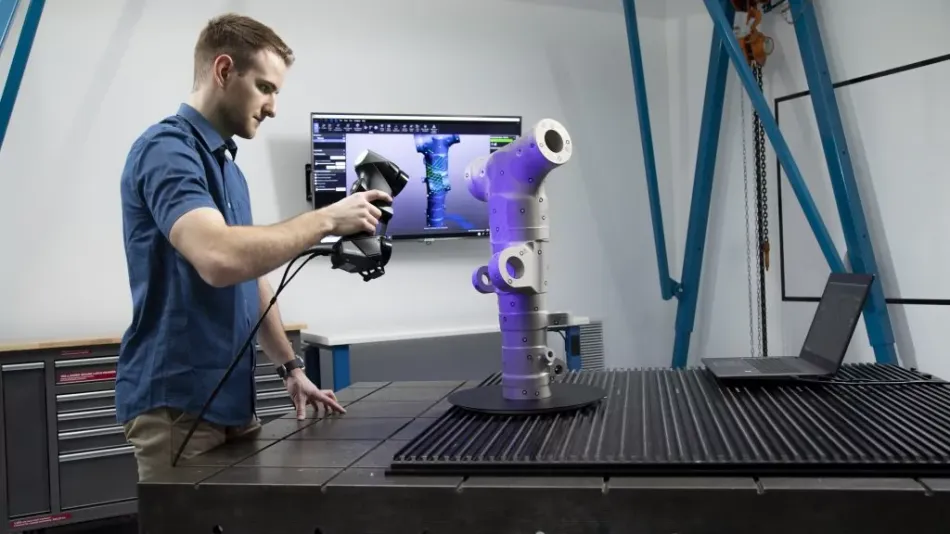
The HandySCAN 3D | BLACK Series is known as the reference in portable metrology-grade 3D scanners. Its fast measurement rate increases the speed of quality control processes, whereas its self-positioning capability and complete portability allow for impressive freedom of movement.
Also certified ISO 17025, the HandySCAN 3D | BLACK Series is the best choice to reach the highest accuracy and the finest level of detail and ensure full traceability of the measuring system.
With its adaptive scanning area, limitless scanning volume, high-resolution cameras, and multiple blue laser lines, it can measure and ensure the quality of any part made of various shapes and complex geometries with specialized finishes and treatments.
Finally, the HandySCAN 3D generates accurate and repeatable results across all work conditions or environments, enabling manufacturing companies to reduce downtime and accelerate customer deliveries.
What Metrology Software Should you Choose for Inspection?
When looking for a metrology software for inspection, attach great importance to the intuitive interface that must be accessible and easy to learn, as well as simple to integrate and operate. Moreover, the chosen metrology software should give you access to all the tools and features needed to conduct first article inspection (FAI), quality control (QC), and quality assurance (QA) during the manufacturing process. Finally, along with offering both the acquisition and inspection functions within a single software module, the software should offer you perfect integration and hardware compatibility with your preferred 3D scanning solution.
These requirements lead us to VXinspect, which is an intuitive 3D inspection software directly integrated into Creaform VXelements. This metrology software for inspection enables quality control and quality assurance professionals to perform dimensional inspections and generate inspection reports based on meticulous engineering requirements.
Whether for performing simple dimensional analysis or building an extensive inspection program, VXinspect offers a complete toolset for all inspection workflows, with no compromises made on measurement quality or geometric dimensioning and tolerancing (GD&T) requirements.
Thousands of users, satisfied with its performance and intuitiveness, have already endorsed VXinspect, considering it as the 3D inspection software that offers the most value for the money spent.
In short, VXinspect is a resourceful assistant, helping you throughout the inspection process. Thanks to its simplicity and efficiency, VXinspect enables you to validate the conformity of manufactured parts and deliver higher quality parts to your customers faster.
Why Choose 3D Scanning for Inspection?
With 3D scanning, quality control can finally leave the metrology lab and be performed directly on the production floor. Because they are engineered to measure parts in shop-floor conditions while preserving part alignment and securing measurement accuracy, Creaform’s 3D scanners are the perfect complement to the CMM.
Now, only delicate inspections of high-tolerance features can remain assigned to the CMM, while all other controls can be redirected to 3D scanning. This action not only ensures product quality through the manufacturing process, but also improves diagnostics on reported quality issues, accelerates simple and daily inspections, and, above all, enables to unload the CMM.
In fact, with Creaform’s cutting-edge 3D scanning technology, possibilities are now limitless. You have the ability to scan any type of part, regardless of size, shape, geometry, surface finish, or material. You also have the flexibility to go anywhere on the production floor to perform quality inspections. This efficiency gain allows for adding intermediate measurement steps, which lead to improved manufacturing and parts of better quality.
