Open Bionics 3D Printed Robotic Hand for Prosthetic Research
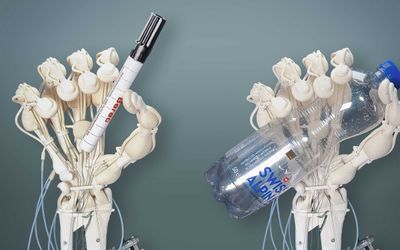
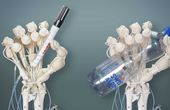
A 3D Printed robotics hand designed for research on prosthetics.
Technical Specifications
| Project Type | Open Source |
| Microcontroller | Arduino |
| Power Supply | 12 |
| Applications | Robotics, Prosthetic Research |
Overview
Open Source 3D Printable Files
The Open Bionics Robotic hand is available in a 3D printed form. So, it allows the users to assemble the parts and implement the electronic systems instantly. However, if there is access to a 3D printer, the user can 3D print all the essential parts and complete the ADA kit.
Each part is so designed that it intuitively fits with the other parts providing a simplified mechanical design for the users. The robotic hand has four major 3D printable parts.
Palm - It must be printed in NinjaFlex material. The rest of the parts can be printed with ABS or PLA. It features a layer height of 0.3 mm with a fill density of 45%. The shell thickness is around 1mm, and the printing speed varies from 16 to 20 mm/s.
PCB Tray - It holds the core PCB that features all the electronic components for the robotic hand. It’s printed with ABS and doesn’t need support printing. Moreover, it takes around two hours to complete the PCB tray printing. The PCB has two layers, i.e., the upper and lower trays, so they must be printed separately.
Back Cover - The back cover can take up to six hours to print and features a couple of holes for wiring.
Independent Linear Actuators for Smooth and Realistic Hand Movements
The robotic hand features five linear actuators. These are PQ12 linear actuators that control the movement of each finger independently. The 3D-printed body provides optimal space to insert the actuators.
Each actuator has a horn to ensure that the motor is well set in its designated position. Assembling the actuators is the second step in completing the robotic hand.
Once the actuators are in place, the PCB tray is inserted atop the motors. This tray provides the base to insert the essential electronics and microcontroller boards that provide the control mechanism to the Open Bionics Robotic hand.
Electronics Assembly for Control Operations
The PCB tray goes right on top of the actuators. Here it’s critical to ensure that the wiring has been fully extracted to ensure connectivity with the battery and smooth signal transmission.
The robotic hand moves into the testing phase as the wires and hardware are mounted. Here it must first go through the necessary electronics assembly. At this stage, the Almond board for the robotic hand is inserted, and the necessary electrical connections are made. After that, the back cover is placed, and the robotic hand can be secured with screws in the threaded inserts placed on the robotic hand.
Easy-to-Use Arduino Development Environment
The Open Bionic Robotic hand works on an Arduino microcontroller. It features the essential sketches in a specialized Fingerlib library. Moreover, the users can download the code files from GitHub and connect the Arduino board.
For example, the Fingerlib library has a test code named ‘MotorTest’. It allows the user to test the motor operations as the user sets the optimal serial transmission baud rate.
Once the motors are running, the final step is to attach the 3D-printed fingers to the motors with the help of tendons. At this stage, the Open Bionics Robotic Hand assembly is complete with a tested output. Hence, users can try new codes and test various applications for research and learning purposes.
